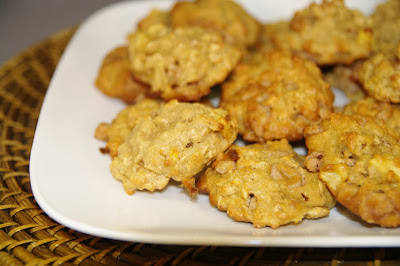
Lemon Blueberry Buttermilk Cookies


As I've mentioned in the past, my husband is a dental student out here in Philly. Because of this, virtually all of our friends are students as well, all of us away from family, and most of us experiencing the east coast for the first time. It's really nice because we can all sympathize with each other when we get homesick, or when we're feeling exceptionally poor that day. We all rely on each other for babysitting, support, or even just a shoulder to cry on. For four years, they ARE your family and we become very close.


The hard part about having student friends is that every year you have to say goodbye to a fraction of them who are lucky enough to be graduating and moving on. It's always sad, but it's also so exciting for them to reach that next step. About a month ago we had a big bbq for the families leaving. It was a lot of fun and a good chance to give hugs and well wishes. Everyone contributes to the potluck and there is always lots of good food.


These were my contribution, I found these cookies on Maria's blog Two Peas and Their Pod. I love Maria's blog, her food is so beautiful and fresh and there is NO shortage of cookie recipes, this girl can bake! These were bright and delicious, and my favorite part was biting into a juicy blueberry. They're perfect for summer and the recipe can be found here. Thanks Maria!

Thick and Chewy Triple Chocolate Cookies


How did you all enjoy the long weekend? I love Memorial Day weekend. Not only does it give us an opportunity to think of those that have fought for our country, but it also feels like the perfect kickoff to summer! My little boy turned four yesterday, which gave us even more of a reason to celebrate with lots of food, friends, and WATER! Our winter-white skin is paying the price now, but it was so worth it.

These cookies were actually made by my husband, who, I've decided, probably needs more recognition on my blog then I give him. We make a good pair, I love to cook, and he loves to bake. It's a hobby I didn't expect him to have, but we haven't had to buy bread in almost a year, so I'm not complaining! The fun thing about having a husband who bakes is that he doesn't get scared easily, he's attacked some pretty involved recipes that I wouldn't dare try.

The funny things about these cookies is that my chocolate loving husband didn't even care for them. But I, who doesn't crave chocolate often, loved them! I thought they were rich, chewy and delicious. I had a really hard time stopping at one. It's probably a good thing that I'm not a huge baker, otherwise these would be in stock at all times!

Thick and Chewy Triple Chocolate Cookies
America's Test Kitchen Baking Book

Ingredients

2 cups all-purpose flour
1/2 cup cocoa powder
2 teaspoons baking powder
3/4 teaspoons salt
4 large eggs
2 teaspoons vanilla extract
2 teaspoons instant coffee (I omitted this)
10 tablespoons unsalted butter, softened
1 1/2 cups packed light brown sugar
16 oz semisweet chocolate, melted and cooled
2 cups semisweet chocolate chips

Directions

1. Adjust the oven racks to the upper-middle and lower-middle positions and heat the oven to 350 degrees. Line 2 large baking sheets with parchment paper. Whisk the flour, cocoa, baking powder and salt together in a medium bowl In a small bowl, whisk the eggs, vanilla, and coffee together until the coffee is dissolved.

2. In a large bowl, beat the butter and sugars together with an electric mixer on medium speed until light and fluffy, 3 to 6 minutes, scraping down the bowl and beaters as needed. Beat in the egg mixture until incorporated, about 30 seconds. Beat in the melted chocolate, about 30 seconds.

3. Reduce the mixer speed to low and slowly add the flour mixture until combined, about 30 seconds. Stir in the chips until incorporated. Cover the bowl of dough with plastic wrap and let stand at room temp until the consistency is scoopable and fudge-like, about 30 minutes.

4. Working with 3 tablespoons of dough at a time, roll the dough into balls and lay them on the prepared baking sheets, spaced about 2 inches apart. Bake the cookies until the edges are set and beginning to brown but the centers are still soft and puffy, 10 to 12 minutes, switching and rotating the baking sheets halfway through baking. (The cookies will look raw between the cracks and seem underdone.)

5. Let the cookies cool on the baking sheet for 10 minutes, then serve warm or transfer to a wire rack and let cool completely. Repeat with the remaining dough using a cooled, freshly lined baking sheet.

False Alarm! Gonna Celebrate with Some Cookies!


If you could see me right now, I would look a bit like this!
,


Why? Because life went ahead and handed me a complete freebie today. When I woke up this morning, my beloved camera wasn't working, and the prognosis was not looking good. And my other equally beloved point-and-shoot camera (along with three months worth of pictures) was lost, hopelessly lost, trust me, I had called and looked EVERYWHERE. There was heartbreak, there were tears, and there may have also been irrational ebay bidding, along with ebay panic, and then utter ebay relief to find that i had been outbid at the last minute.

But then miracles happened, and not one, but BOTH of my cameras were restored to me by the end of the day. There was relief, there were more tears (so I love my cameras okay), and then there were cookies. How else does a foodie celebrate if not with food? Thank you all for your sweet comments at my post below, but I can't even tell you how happy I am to not have to take a break after all!


I found these gems at Gina's Skinny Taste, a wonderful blog with light recipes, especially conducive to those doing Weight Watchers. Now I'm all about cooking and eating healthy, but when it comes to dessert, I'm a purist. I don't think dessert should be messed with, just eat the dang brownie! But if you were to serve me these cookies without ever mentioning that they were light, I don't think I'd ever know. They're chewy, they're sweet, they are loaded with chocolate and my whole family LOVED them! Like a good girl, I had two, but I could have eaten these babies all night. Check out the recipe here!


Don't you love the plate? My parents sent it for my birthday a few days ago, I think I should be allowed to use it for at least a month, don't you? :)

Breakfast Cookies


As I've mentioned in the past, I'm not much of a breakfast person. Nothing sounds worse to me first thing in the morning then eating. Luckily for my kids, my husband loves breakfast. Being the baker-man that he is, my kids are always enjoying waffles, pancakes and cinnamon rolls. So when he took off to Texas for two weeks, I had to step it up in the morning and take on the role of the fun breakfast maker.


Imagine how much fun I had greeting my kids first thing in the morning with the phrase "I'm making cookies for breakfast!" Yeah that's right, mom can be cool too! But these aren't regular cookies, they're packed with banana, peanut butter, wheat germ and dried fruit. For good measure I threw some chocolate chips in there, because, well, you know. They're fluffy and have more of a cake-like texture, but they're so delicious and go great with milk. So go ahead, make cookies for breakfast!


Breakfast Cookies
By Food.com

Ingredients

1/2 cup peanut butter
1/2 cup butter, softened
3/4 cup brown sugar
1 eggs
1 teaspoon vanilla
1 cup bananas, mashed
1/2 teaspoon baking soda
1/4 teaspoon salt
3/4 cup flour
3/4 cup wheat germ
2 cups rolled oats
1 cup raisins or 1 cup other dried fruit
1/2 cup mini chocolate chips (optional)

Directions

1. Preheat oven to 350 degrees.

2. Combine peanut butter and butter and beat on medium with an electric mixer.

3. Add brown sugar; beat until combined.

4. Add egg and vanilla; beat until combined.

5. Add banana, baking soda & salt; beat until combined.

6. Add flour & wheat germ, a little at a time, and beat until combined.

7. Stir in rolled oats, dried fruit and chocolate chips (if using) by hand.

Per Cookie: 170 cal, 7g fat, 23g carb, 2g fiber, 4g prot

A Very Bloggy Christmas

Initially I didn't plan to do this, I was just going to start fresh for the new year. But I just don't feel right about letting these wonderful treats go without giving credit and thanks to the bloggers who posted them.

I basically found all of my baking and treat ideas from the blogosphere this year, and while I didn't get to make near as many things as I would have liked, what I did make turned out ah-mazing! Here are some of the reasons my pants no longer fit :)


I absolutely could not go an entire Christmas season without making my all time favorite Christmas cookie, the Peanut Butter Blossom! So quick and easy, and when I say easy, I mean easy to stuff about ten down my throat at once! I know this recipe isn't much of a secret, but I always visit my aunts cookie blog, Sugarbliss for the recipe every year. Thanks Rebecca!


I found this sweet Holiday Chex Mix on Cooking with Cristine. Look at those adorable homemade Santa hats! So simply made by dipping bugles into red or cherry chocolate, and then into white for the trim. This was a pretty and delicious treat to pass out to friends. Thanks Cristine!


When I found these Creme-de-Menthe bars on Joanne's blog, Eats Well with Others, my oven was still broken and I could barely stand to wait to make this. Rich chocolatey brownies, with a creamy, minty, butter cream center, and a shell-like chocolate finish to this brownies from heaven, made for a very happy Teresa. No one else in my family is big into the mint-chocolate combo (crazies!) so I ate half the pan, and the other half is in the freezer just biding their time until I decide to cheat on my New Year's diet. Oh Joanne, how I love these bars!


And last, but certainly not least, Peppermint Thumbprint Cookie Cups from Barbara Bakes. Okay, so I did cheat a bit by just adding kisses instead of "thumbprinting" them, but I guarantee that either way you make them, you'll love them! Thanks so much Barbara!

And thanks to Blogland for providing us with SO many Christmas goodies, stories and heartfelt wishes. Even if I didn't make your treats, rest assured I imagined their smells and tastes and enjoyed a bit of the season with you! Enjoy the rest of your break and Happy New Year!

Monster Cookies


My oven is broken, and it won't be fixed for a week. I. AM. DYING. Not only does it hamper my ability to cook regular meals for my family, but it's also broken during the biggest baking season of the year! If you listen very carefully, you'll hear my waistline sigh in relief. However it's being completely drowned out by my heart, soul and stomach, who are screaming in bitter protest. I'm not a huge baker, but this time of year I live for it. Lord, give me the strength to last the week.

Dramatics aside, I have to share with you one of my favorite cookies. The first time I tried these I was at my cousin's house. She keeps the dough, frozen in ready made blobs, ready to throw in the oven, how genius is that! I ate one fresh out of the oven, closed my eyes and sighed that it was the best cookie I had ever eaten. That hasn't changed, which is why it's a surprise to me that it's taken this long to make them again. This was actually a product of having way too many leftover M&M's from Halloween. These cookies seriously have everything in them, peanut butter, oatmeal, chocolate, raisins, no wonder they're my favorite!

Sigh, I'd like to post this recipe in honor of my broken oven, I can't wait to be reunited!

Monster C0okies
Paula Deen

Ingredients

3 eggs
1 1/4 cups packed light brown sugar
1 cup granulated sugar
1/2 teaspoon salt
1/2 teaspoon vanilla extract
1 (12-ounce) jar creamy peanut butter
1 stick butter, softened
1/2 cup multi-colored chocolate candies
1/2 cup chocolate chips
1/4 cup raisins, optional
2 teaspoons baking soda
4 1/2 cups quick-cooking oatmeal (not instant)

Directions

Preheat the oven to 350 degrees F. Line cookie sheets with parchment paper or nonstick baking mats.

In a very large mixing bowl, combine the eggs and sugars. Mix well. Add the salt, vanilla, peanut butter, and butter. Mix well. Stir in the chocolate candies, chocolate chips, raisins, if using, baking soda, and oatmeal. Drop by tablespoons 2 inches apart onto the prepared cookie sheets.

Bake for 8 to 10 minutes. Do not overbake. Let stand for about 3 minutes before transferring to wire racks to cool. When cool, store in large resealable plastic bags.

Awesome Cookie Cupcakes


I know it seems a bit silly posting a recipe like this after whining about how hard it's been staying the healthy course, but in my defense, I made these before making my goals, and they're just too fun not to post.

I couldn't help of thinking of my sweet bloggy friend Kim when I made these. If you know Kim, you know that she is the queen of all things cupcakes. I believe she's even turned savory dishes like lasagna into a cupcake, so fun! These are so rich and delicious, and a bit different from your average chocolate chip cookie because instead of chocolate chips, we used chocolate covered raisins, and chocolate covered peanuts, with mini M&M's to make them adorable. They can be made into full sized cupcakes as the picture shows, or for a more bit-sized treat, you can do mini muffin sized. And of course, they do just fine as regular cookies too. It was amazing to me how different the flavor and texture of these cookies were in cupcake form, so chewy and moist, a very fun variation on one of my favorite treats. I hope you enjoy!

Awesome Cookie Cupcakes

Ingredients

1 cup butter flavored Crisco (not butter, or margarine)
1 cup packed brown sugar
1/2 cup sugar
1 teaspoon vanilla
2 eggs
2 1/2 cups flour
1 teaspoon baking soda
1 teaspoon salt
1 cup chocolate covered raisins
1 cup chocolate covered peanuts
1/2 cup mini m&ms, optional

Directions

Heat oven to 350. Beat Crisco, sugars, and vanilla until fluffy. Add eggs and beat again until fluffy. Pour in flour, soda and salt. Stir until well-blended. Add chocolate covered nuts and raisins (fold in gently). Drop a large spoonful into muffin paper, filling 3/4 of paper. Bake 18-20 minutes, don't overbake!

Dough refrigerates very well, so you can make a few cookies at a time if desired.

Gingerbread House Party and Happy Holidays!


Seeing as this is in fact a Blog About Food, I figured it would be only appropriate to post my gingerbread house party. This is the second one I've done in a row, and I'm really hoping it becomes an annual thing, it's so much fun, especially since the entire thing is involving food!

About a month before the party I make the gingerbread houses, which are the same houses my mom has been making for us our entire lives. They are small and simple, but made out of real gingerbread and are so cute. I freeze them, and then the day before the party, I assemble them with hot glue. It's probably not the most traditional way to assemble them, but it's non-toxic, peels right off, and ensures the fewest broken down houses. I also provided the frosting and piping bags, and then everyone brings a different candy to decorate with.


And here you have the fabulous people that came! You'll notice there are no kids, I think adults should be able to have some good, old fashioned Christmas fun too, don't you! I love these girls. Lots of laughing, eating, and staying up way too late, so fun!

And on to the food.

In the crockpot are Li'l Smokies, dressed in a very complicated sauce of ketchup and mustard. Sounds a bit too simple, but trust me, it's fantastic, and everyone is surprised when they find out that's all it is. There was also a veggie tray with a side of ranch dip (gotta keep the veggies around during the holidays!)

Alissa, from Spunky Girl Eats, brought her fabulous stuffed mushrooms, which disappeared SO quickly. Oh my gosh these were good!

I made Melanie, from My Kitchen Cafe's fantastic cheesecake cookies, bejeweled in a strawberry and blueberry pie filling, how pretty are these, great cookies Melanie!

And of course I had to make cakeballs. I made dark chocolate and mint chocolate cake balls, both made with chocolate cake and chocolate frosting. The mint cakeballs are coated in a mint-chocolate shell using the Wilton candy chips. They were good, but not quite minty enough for me, next time I'm going to put some chopped Andes mints right into the cakeballs.

We had other people bring fantastic treats too, but unfortunately I didn't get pictures of it all. Suffice it to say, there was plenty of food to go around!

I'm so happy with the way things turned out, and I'm already looking forward to doing it again next year. Thank you so much girls for making it a fun night!

And now we're getting ready to board a plane tomorrow to Idaho to spend two blissful weeks with my favorite people in the world. Because of that, I'm probably going to be signing off for the year 2009, it's been a great year hasn't it! So a toast!


My family does an eggnog toast every Christmas Eve, but inevitably they get really silly and by the end of the toast we're all in stitches. Since eggnog is so rich, I can't drink a lot of it, but my friend suggested thinning it out with a bit of Sprite or 7up. It might sound a bit crazy, but it's really delicious and cuts the thickness without losing a lot of flavor. I also love that it's bubbly! So here's to a wonderful holiday and a promising new year! Thank you everyone for all of your support and willingness to read throughout the months, it has made food blogging so very enjoyable. I'll see you all in 2010!
Cheers!

Mint and Chocolate Capped Brownie Bites


As I've mentioned, I really love this time of year. I love going to the mall and looking at how cute they've decorated it. I love the sparkling street lights. And I LOVE LOVE LOVE that you can buy all the mint chocolate you want! My favorites are the Hershey's mint kisses, with the candy cane ones coming in at a close second. They only come out at Christmas time, which I kind of like because it keeps them a real treat. Do any of you have your special treat that you only eat during the holidays?

Anyway, I found this recipe on the bag and I had to make them. After all, the only thing better than a mint chocolate truffle, is a mint chocolate truffle attached to a brownie. The fun thing about these is that you could really make them with any of the different flavors of kisses out there, cherry, coconut, almond, caramel, etc. They were fun to make and really tasty, the only thing I would do different next time is to just forget the little cupcake papers. They stuck to the brownie bites and just got in the way of eating them, otherwise, they're wonderful!

Mint Capped Brownie Bites

Ingredients

48 Kisses, flavor of your choice
2/3 cup butter or margarine, softened
1 1/4 cups sugar
1 tablespoon water
1 teaspoon vanilla extract
2 eggs
1 1/2 cups flour
1/2 cup cocoa powder
1/2 teaspoon salt
1/4 teaspoon baking soda
powdered sugar

Directions

1. Heat oven to 350 F. Line 48 small muffin cups with paper or foil mini muffin cups. Remove wrappers from chocolate.

2. Beat butter, sugar, water and vanilla in a large bowl on medium speed of mixer until well blended. Add eggs; beat well.

3. Stir together flour, coca, salt, and baking soda. Gradually add to sugar mixture, beating on low speed just until blended. If necessary, refrigerate dough until firm enough to handle. Shape dough into 1-inch balls; place in prepared muffin cups.

4. Bake 11-13 minutes, or until cookie surface is set. Cookies will appear soft and moist. Do not overbake. Cook about 5 minutes on wire rack. Press chocolate piece into center of each cookie bite. Cool completely and sprinkle with powdered sugar.

Peanut Butter Chocolate Dessert


Do yourselves a favor and don't make this dessert. I wouldn't even continue reading this post if you don't want to get sucked in to making this dessert. You see, this particular dessert is pure evil. Honestly, I don't even remember making it, it was just there, in front of me, forcing me to take one bite after the other! Even when my belly was screaming to stop, I couldn't stop myself from taking just one more bite! It calls to you at inconvenient times, like at two in the morning, when you can't sleep, or while you're on the treadmill, or singing hymns at church. You'll crave it for breakfast, lunch and dinner. And when it's finally gone, and you think you're free of it, it will continue to haunt you, begging you to make it again. And you'll lay awake at night thinking about how much you miss it's rich layers of it's crumbly oreo crust, creamy peanut butter center, chopped peanut butter cups, fluffy chocolate spread and crushed oreo topping.

Luckily I've managed to escape it's evil spell, that's right, I've learned my lesson. I'm never making this dessert aga.....

Peanut Butter Chocolate Dessert
By Taste of Home, Best of Holiday Recipes 2008

Ingredients

20 oreos, divided
2 tablespoons butter, softened
1 8 oz package cream cheese
1/2 cup peanut butter
1-1/2 cups cups confectioners sugar, divided
1 16 oz carton whipped topping, thawed, divided
15 mini peanut butter cups, chopped
1 cup cold milk
1 3.9 oz instant chocolate fudge pudding mix

Directions

1. Crush 16 cookies (I used my food processor), toss with the butter. Press onto the bottom of ungreased 9-inch square dish.

2. In a large mixing bowl, beat the cream cheese, peanut butter and 1 cup confectioners sugar until smooth. Fold in half of the whipped topping. Spread over crust. Sprinkle with peanut butter cups.

3. In another mixing bowl, beat the milk, pudding mix, and remaining confectioners' sugar on low speed for 2 minutes. Fold in remaining whipped topping. Spread over peanut butter cups. Crush remaining cookies; sprinkle over top. Cover and chill for at least three hours before serving.

Apple Cinnamon Oatmeal Cookies with Homemade Cinnamon Chips


A few weekends ago our family had the funnest day going apple picking at an orchard nearby. We rode a haywagon, tasted some delicious apple fritters and danced to the music playing on the nearby stage. It really doesn't get better then that, does it? But since then I have been doing everything I can to use up our entire box of apples so they don't go to waste.

I saw this recipe on Maria's blog at Two Peas and Their Pod. I am such a fan of Maria's food, I'm always so excited to try her recipes. The only downside to these cookies was that I could not find cinnamon chips, ANYWHERE! I was just about to admit defeat until my genius friend Alissa gave me the idea of making my own. All is takes is melting white chocolate bark or candy chips with a whole bunch of cinnamon and piping them in the shape of chips. The only think I would do different is add more cinnamon for some stronger tasting chips, but otherwise they were so fun, and just delicious in the cookies!


Homemade Cinnamon Chips

Ingredients

1 bag of Wilton White Chocolate Melts (or almond bark)
Ground cinnamon, to your taste (I used 3-4 tablespoons)

Directions

Melt White Chocolate. Add cinnamon to desired taste and mix thoroughly. Fill piping bag, or ziplock bag with snipped tip. On wax paper, pipe small chips using a circular motion. Allow at least a half hour to dry and cool. Store in a cool, dry place.

I don't think I'll ever declare a favorite cookie, but these definitely go in my top ten, they're like an apple pie in cookie form, and they make your house smell like heaven!

Apple Cinnamon Oatmeal Cookies
By Maria at Two Peas and Their Pod

Ingredients

1 1/4 cups all purpose flour
1/2 tsp. baking soda
1/2 tsp. baking powder
1/2 tsp. salt
Pinch of fresh nutmeg
Pinch of all spice
1/2 tsp. cinnamon
4 T unsalted butter, at room temperature
1/4 cup sugar
1/2 cup dark brown sugar
1 egg
1 tsp. vanilla
1/2 cup applesauce
1 apple, diced (I used Granny Smith)
1 1/4 cup oats-not quick cooking
3/4 cup cinnamon chips

Directions

1. Preheat the oven to 350 degrees. Line a cookie sheet with a Silpat or parchment paper.

2. In a large bowl add the flour, baking soda, baking powder, salt, nutmeg, all spice, and cinnamon. Whisk until combined.

3. In the bowl of a mixer combine the butter and sugars until smooth. Add in the egg and vanilla. Mix until combined.

4. With the mixer on low, add in the applesauce and diced apple. Mix until well combined.

5. On low, slowly add in the flour mixture. Don't over mix. Mix just until the flour mixture disappears.

6. Stir in the oats and cinnamon chips. Drop rounded tablespoons of the cookie dough onto the cookie sheet. Place the cookies 2 inches apart.

7. Bake for 10-12 minutes. Let the cookies cool on the cookie sheet for a couple of minutes. When set, transfer them to a cooling rack.

Pumpkin Chocolate Chip Cookies


I know that pumpkin chocolate chip cookies are pretty common, especially this time of year, but I wanted to share this recipe anyway. Rather then being a dense cookie, these are such soft, melt-in-your mouth fall treats. I've already made them a few times, and I need to stop because I can't stop sneaking them!

I'm so glad it's Friday! I'm particularly exhausted today, so I am very much looking forward to a nice, quiet weekend. Between that and the cool weather, snuggling with a warm blanket and a good movie sounds perfect! I hope you all have a wonderful, and relaxing weekend!

Pumpkin Chocolate Chip Cookies
Found in Allrecipes.com

Ingredients

1 cup shortening
2 cups white sugar
2 eggs
2 teaspoons vanilla extract
1 (15 ounce) can pumpkin puree
4 cups all-purpose flour
1 1/2 teaspoons baking soda 1 1/2 teaspoons baking powder
1 teaspoon salt
1 teaspoon ground cinnamon
1 pinch ground nutmeg
1 cup semisweet chocolate chips
1 cup chopped walnuts (optional)

Directions

1. Preheat the oven to 375 degrees F (190 degrees C). Grease cookie sheets.
2. In a large bowl, cream together the shortening and white sugar until smooth. Beat in the eggs one at a time. Stir in the vanilla and pumpkin until well blended. Combine the flour, baking soda, baking powder, salt, cinnamon and nutmeg; stir into the pumpkin mixture. Mix in the chocolate chips. Stir in the walnuts if desired. Drop by teaspoonfuls onto the prepared cookie sheets.
3. Bake for 12 to 15 minutes in the preheated oven, until edges begin to brown. Allow to cool for a few minutes on the baking sheets before removing to wire racks to cool completely.

Chocolate Scotcheroos


A few weeks ago I had to make treats for a large group of children. I found these Scotcheroos on allrecipes.com, and got really excited, because my mom used to make these for us all the time for an after school snack. They just about as quick and easy to make as regular rice crispy treats, but have all the extra flavors of peanut butter, chocolate and butterscotch. They also have a magic power that will force you to eat five or six in one sitting, don't blame yourself, it's not your fault.

If you're looking for an easy, quick treat, give these a try. They're a hit with kids and adults!

Chocolate Scotcheroos
Found in allrecipes.com

Ingredients

1 cup Light Corn Syrup
1 cup sugar
1 cup creamy peanut butter 6 cups crispy rice cereal
1 cup semi-sweet chocolate chips
1 cup butterscotch chips

Directions

1. Cook corn syrup and sugar together in a large pan over medium heat, stirring to dissolve sugar. Bring mixture to a boil. Remove from heat. Stir in peanut butter; mix well. Add cereal; stir until evenly coated.

2. Pour into greased 13x9-inch pan and pat into place.

3. Melt chocolate and butterscotch chips together in saucepan over low heat, stirring constantly. Spread over cereal.

4. Cool at least 45 minutes, or until firm. Cut into bars.

Oreo Truffles


A huge shout out to Melody at Cheat Day Cafe for posting these morsels from heaven! If you haven't visited her blog yet, you're missing out. Her recipes and personality have me going back regularly!

What is it about these little bite sized treats do I love so much? I needed a treat to take to a baby shower, and since I've made cakeballs ad nauseum, I figured it was time for something different, so I made these, lol!

These Oreo truffles are simply divine, especially if you are a chocolate lover. And I love using the chocolate candy melts, rather then chocolate chips, because they made a very crisp coating that goes so well with the Oreo. Mmmmmm, next time I make these, I'm freezing half so that I can enjoy them for weeks to come!

Oreo Truffles
From Melody at Cheat Day Cafe

Ingredients

1 16 oz package of Oreos (not double stuff)
1 8 oz package of cream cheese
Dark Chocolate melts (I used Wilton, and they can be found at most craft stores)
White Chocolate melts, optional for garnish

Directions

1. Blend Oreos in a food processor until finely crushed.

2. Mix cream cheese in mixing bowl until creamy. Add Oreo crumbs, and blend until completely combined.

3. Roll into 1 inch balls, or smaller, place on a cookie sheet and freeze for at least twenty minutes to harden.

4. Melt dark chocolate. Dip each truffle into chocolate (I just used a spoon to coat the truffle, and then pulled it out, tapping excess chocolate on the side of the bowl). Place on wax paper to dry.

5. For garnish, melt white chocolate in a plastic ziplock bag. Snip tip of bag and drizzle over top of truffle. Once dried, store in refrigerator.

Fruit Pizza


This was another treat we got at my mom's house. She has been making these as long as I can remember, and as far as I know, no one makes them as pretty and as delicious as she does. Her cookie base is more then just a sugar cookie, it is a chewy, but crispy, oatmeal cookie, that could easily stand alone on it's own. The "sauce" for the pizza is so sweet and creamy, a perfect blank palate for any fruit that is in season. I took this over the summer time, so obviously berries were an appropriate choice. Right now, peaches and pears would be wonderful, or even apples, cut up in chunks and sprinkled with cinnamon and sugar.

You can arrange the fruit on the pizza and then serve, or you could leave it empty with just the sauce and allow people to pile on the fruit of their choice. Either way, this pizza will be an absolute hit!

Fruit Pizza
Recipe provided by my amazing mom!

Ingredients

COOKIE:
3/4 c soft margarine
1/2 c sugar
1/2 c brown sugar
1 egg
1 t vanilla
1 2/3 c flour
1 t soda
1 1/3 c quick oats
dash salt
SAUCE:
1 small pkg instant vanilla pudding
2 c milk
8 oz softened cream cheese
Stir in
1 c Cool Whip
1 c powdered sugar

Directions

COOKIE:
Beat margarine. Beat in sugars, egg & vanilla. Beat well. Sift flour, salt & soda and add to creamed mixture. Mix well. Stir in oats. Chill 1-2 hours or overnight. Roll (pat) evenly onto hot pizza stone. Bake 350 for about 15 minutes. Loosen from pizza stone and cool.

"SAUCE:"
Mix and beat well:
Spread over cooled crust and top with a variety of colorful fruits! I macerate all the fruit I top the pizza with. I think pizza is best after sitting for awhile, allowing topping to integrate with cookie crust.
Copyright 2011. All rights reserved.
artist photos